I’ll admit I used the term arboreal loosely here – ball pythons are most certainly not arboreal, nor is a 3ft tall tank really an “arboreal” setup, but a lot of folks call anything above 12″ tall arboreal when referencing python enclosures. With that said, arboreal in this case really just means we are giving our ball python some vertical climbing opportunities. On to the post…
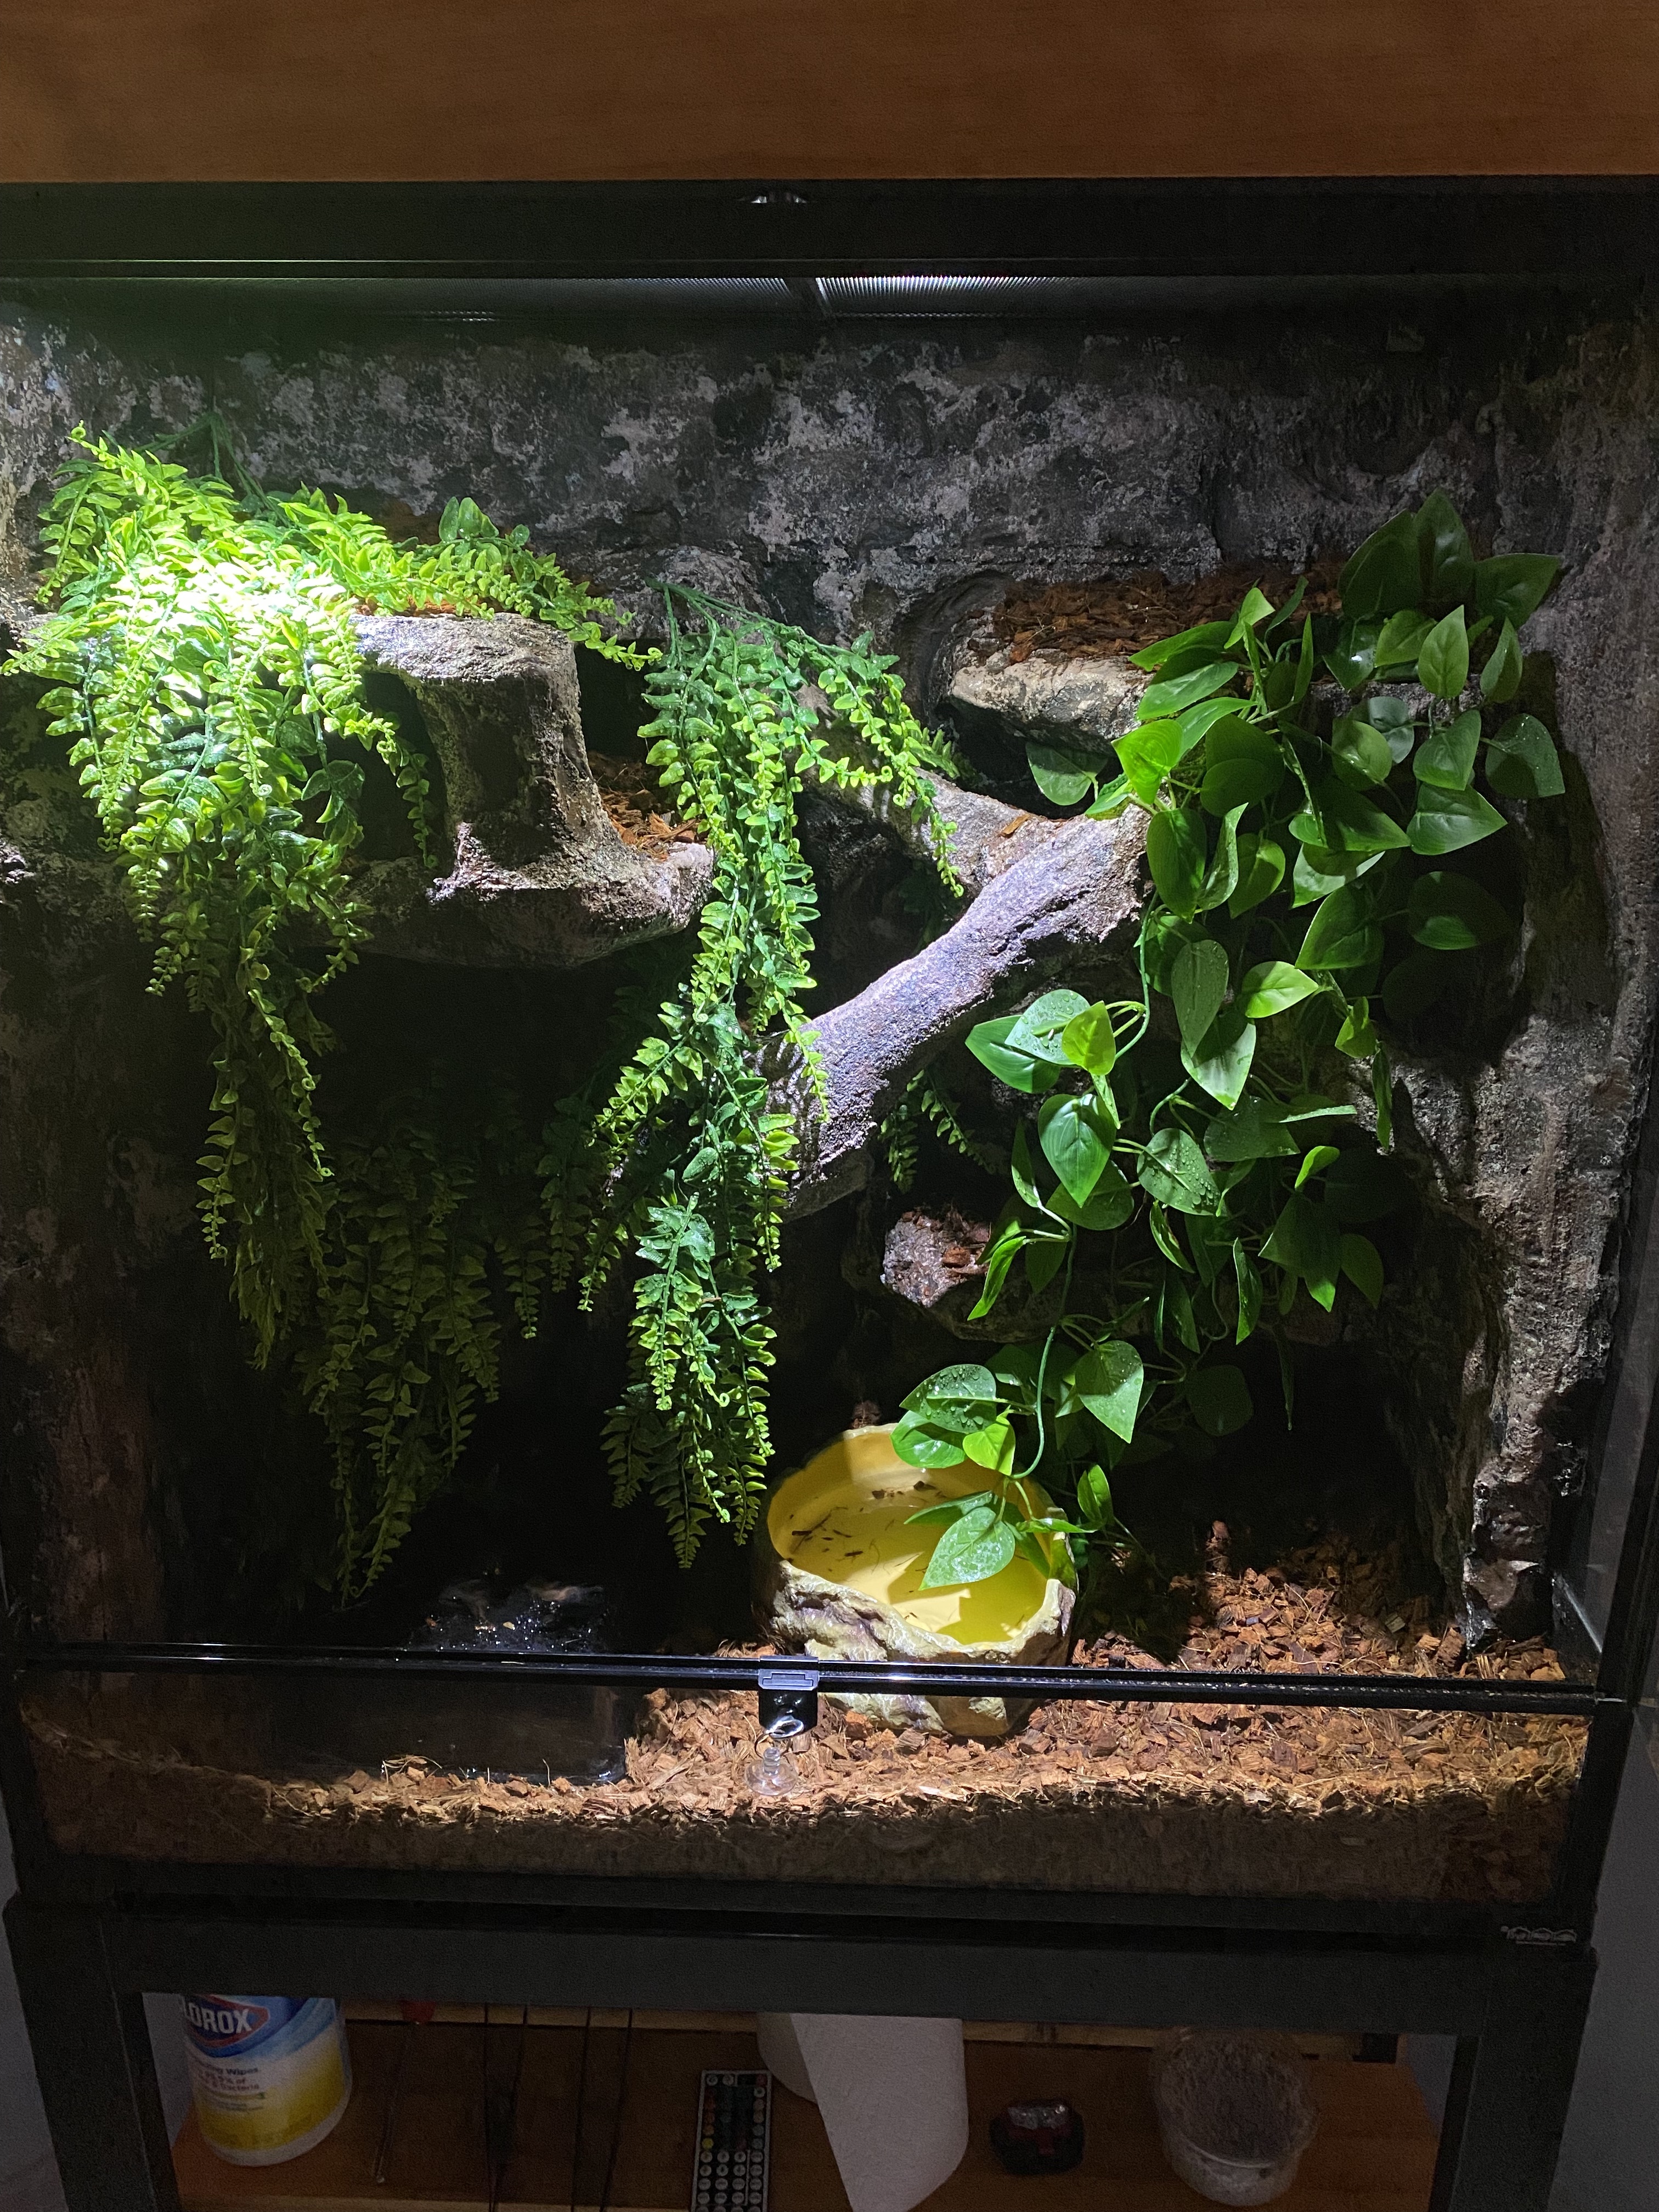
Our son’s male ball python, Pumpkin, finished off his quarantine period so we decided to make him a new permanent enclosure. Though most ball python enclosures focus on horizontal space, we decided to experiment with a taller vivarium that allowed for more climbing opportunities with a series of shelves and artificial limbs. Our goal was to provide an enriching environment for Pumpkin to explore regularly with lots of nooks and textures. This page takes you through the construction of his enclosure.
There are three horizontal interconnected shelves on each side of the vivarium, as well as the typical hot hide and cool side areas on his vivarium floor:

parts list
The base enclosure was a 36″ x 18″ x 36″ Carolina glass vivarium.
The build out used a foam background strategy common in the dart frog hobby. My parts list was:
- 1 sheet of 2″ pink insulation foam
- 6 cans of great stuff
- 2 tubes of silicone adhesive
- 1 gallon of drylock masonry sealant
- charcoal concrete tint
- terra cotta concrete tint
cage assembly
Carolina Custom Cages provides good assembly instructions for their vivariums. I was having trouble sourcing large Exoterra vivs locally, so I ended up trying out Carolina, and my opinion is generally positive.
- [ + ] the vivariums ship flat, and that they are in stock and readily available at Amazon.
- [ + ] the heavy duty screen that ships with the unit
- [ + ] the bottom section is shipped with the intent to hold water
- [ – ] the doors in general – they are difficult to get square
- [ – ] the doors ship with suction cups for pulls – pretty lame. I bought some nicer looking aluminum self adhesive pulls for a much nicer finish.
- [ – ] the door locking mechanism – it’s just bad – I much prefer the latching mechanisms from Exoterra and Zoo Med.
I followed their assembly instructions, but I did modify one thing – I ran a bead of silicone down every interior seam after assembly. This provided additional stability and waterproofing to the enclosure. I do this for all my vivs, because at one point or another they may be used for a humid viv as part of my dart frog keeping.
In general, I like the Carolina cages, but I HATE the doors 🙂
background build
It took approximately two weeks to build the background. The 2″ foam panels were cut to fit the back and sidewalls. The foam panels were scored and silicone was used to fasten the panels to the glass sides of the vivarium. Shelves were mounted horizontally by scoring the main foam background and paneling adhesive was used to fix the shelves in place.
A kitchen knife was used to bulk sculpt the foam removing the majority of the large pieces of foam to form a general shape. A combination of a drill mounted wire brush and a hand wire brush were used for finishing the textures on the simulated rock.
After carving and texturing I sealed the background with a thick base coat of Drylock tinted dark grey with concrete tint. I then dry brushed on a medium gray, then a light gray coat. I finished with dry brushing of a brown coat to create the final dabbled effect on the rock.
hood build
I also built a custom hood:
- 2′ x 4′ panel of 1/2″ plywood
- two 1″ x 4″ x 6′ pine boards
- LED power supply / MR16 sockets & LED spot lights for daylight
- LED ribbon kit for red night lights
- 80mm exhaust fan and power supply for venting
- extension cord, 2 light sockets, 2 ceramic heat emitters for upper heat
- aluminum reflective tape for hood insulation
- stain
It sounds fancier than it is, but I simply build a frame around a piece of plywood and drilled two holes in it – one in the top for a venting blow hole for an 80mm computer fan, and an access port in the back for wiring.

day and night lights
I wired in four key electrical components:
- an extension cord soldered to a waterproof power supply soldered to an MR16 wiring harness I built following the typical lighting strategy I used in my dart frog vivariums. I wired for three sockets, but ended up only putting bulbs in two.
- a $15 LED strip kit for red night lights
- a custom wired extension cord wired to two ceramic sockets that house mini CHEs
- an 80mm exhaust fan used to cool the hood and actively vent the vivarium

I used two highly direction 5w LED spots for daylight. This is simply for the humans in the household, and it provides pretty dramatic daylight lighting for when Pumpkin is in his hides.

The LED red night lights are also for us humans, but they allow us to better see Pumpkin moving around at night for a few hours before we turn them off and head to bed while he parties away in all his space.


stand
The stand was from Petco – a standard metal frame 40 breeder stand that I modified slightly with a foam insulation panel under the enclosure and custom cut & stained boards that served as shelving.
I also drilled the vivarium like I do for my frog enclosures, but I used the bulkhead for a lower thermometer that controls the under tank heating. I used two thermostats on different thermometers, one for the CHE’s and one for the UTH. There are two HomeKit enabled smart switches that control the day and night lights.

the hides
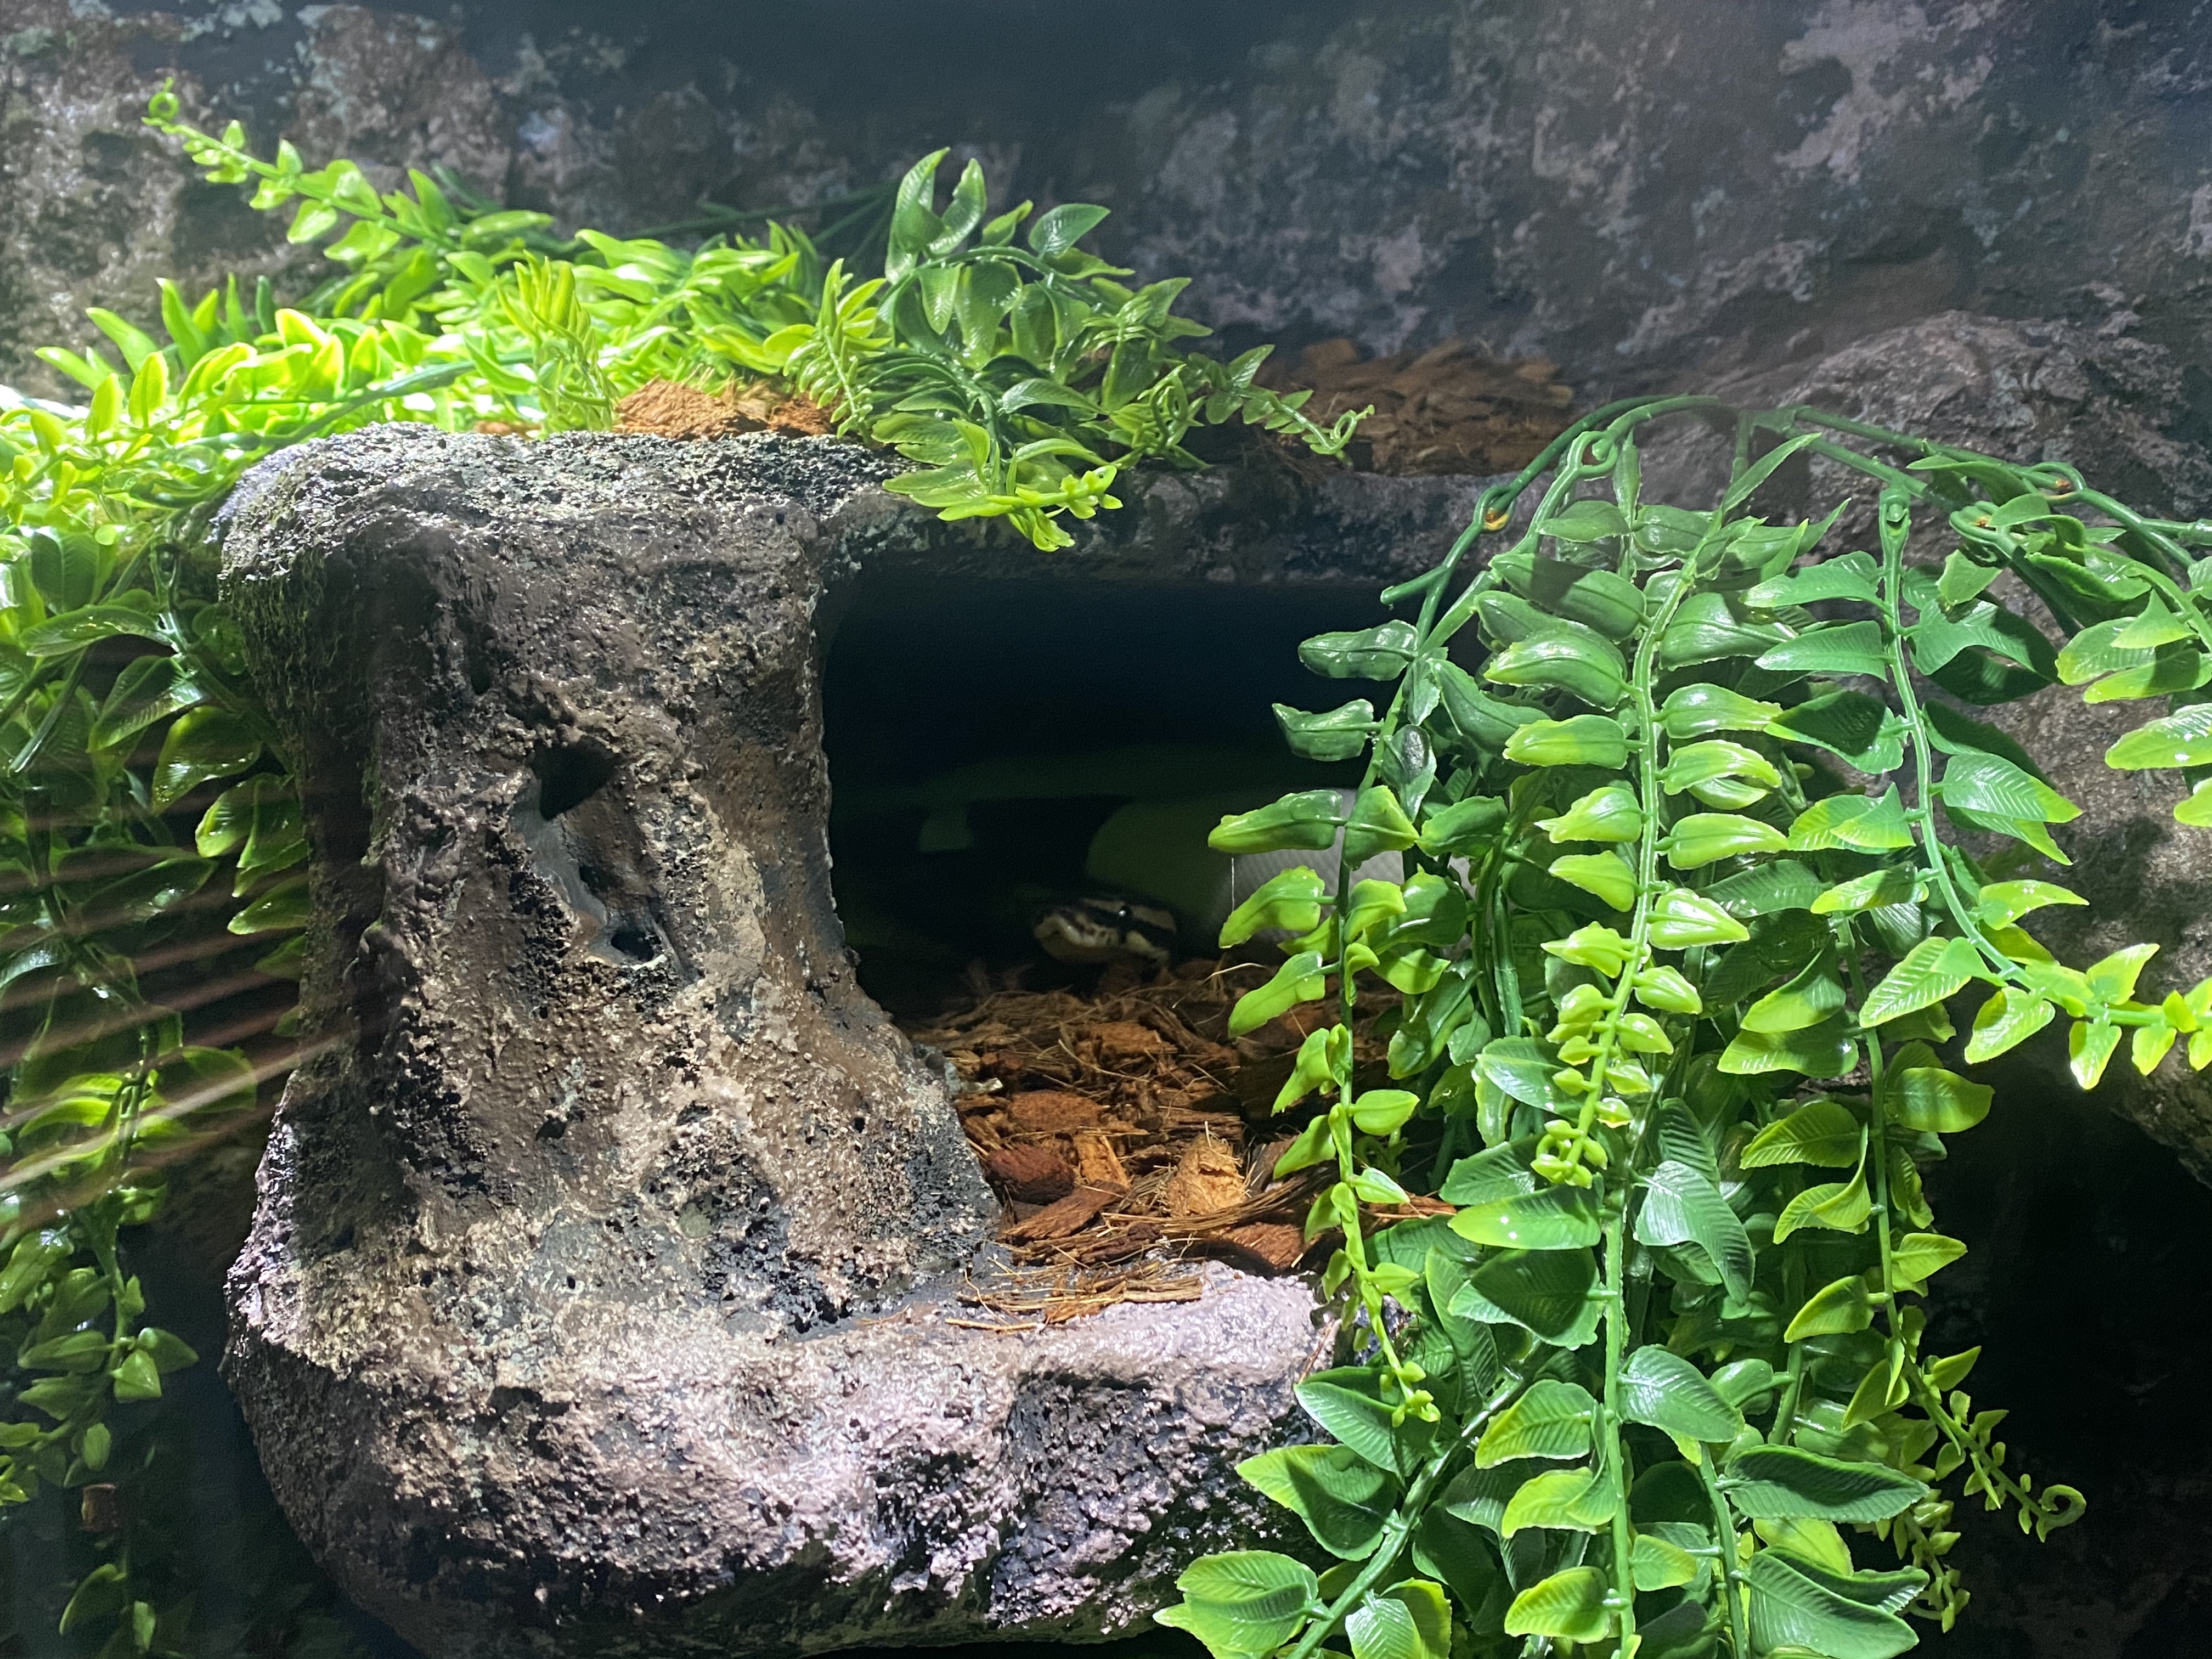
We build in a series of shelves for climbing, basking and hiding. Pumpkin alternates between two hides – his lower hide on the floor that is his hot hide, and his high hide – a stacked set of two shelves that he can wedge himself in. This is a cooler spot that he seems to prefer at times.
You can see how the CHE’s are set right above the high hide:

The high hide has a front support pillar that also doubles as a visual block. We also added two sets of artificial fern fronds that further serve as visual barriers – this makes Pumpkin feel secure in the high hide, and has become his favorite cool hide.

And the hide in use:


climbing surfaces
We also used foam to build connecting climbing surfaces to the staggered background shelves. This allows Pumpkin to grab on a variety of surfaces as he moves up and down the viv. Here are the two key cross members that he uses to move around:

pumpkin in action


final thoughts
This was a fun project that allowed us to customize a vivarium for our buddy Pumpkin. We had him in a QT 20L tank for the first 7 months we had him as he grew out from 180g to over 600g. We observed his behavior during that time, and noticed how active he was at night and how much he liked climbing over different objects we put in to his tank. Those observations formed the basis for the design concepts we used in his permanent viv. Overall we feel like this has been a great success for Pumpkin – he uses every shelf in the viv, and we can see him moving around the entire vivarium every night. He really uses the space and takes advantage of his ability to explore vertical obstacles. We cannot help but feel that this provides a very enriching opportunity for one of our favorite pets.
